


FREE eBook – How To Airbrush Real Fire…step by step
In this free eBook you are going to learn how to airbrush real fire step by step. You are also going to get the EXACT paint formula, colors, and the orders these colors are used.
I also have step by step videos that can be found here at my online airbrush training site.
Airbrushing real fire isn’t that hard once you learn the technique. To get it to look right and to actually look like fire with the real hot spot is a horse of a different color though…unless you have the exact color formula that actually works right. Fortunately for you, in this free eBook you will get the exact color formula to use and it’s the right one that makes this fire actually look real.
The colors needed for this real fire are listed below:
- Moly Red/Orange (Candy apple red and tangerine orange mixed together)
- Candy Red/Maroon
- Chrome Yellow
- Candy Tangerine Orange
- Candy Pegan Gold
- Passion Purple
Using the right color combination will make your fire look real and it will make your learning of this much easier. This will ALL be revealed in this free eBook, as well as in the step by step videos that I mention in this free eBook and article.
Below here you will find more materials needed for this fire project. Reducers, brands, etc.
- I use House Of Kolor candy concentrates for mixing my own candy colors.
- I use PPG DBC 500 color blender for mixing with the candy concentrates to make my candy colors and then reduce as needed to flow through the airbrush properly. Usually 2:1 mixture.
- I like the PPG reducers best for all of my mixing and reducing of paints, candy’s, cleaning, etc.
- I use all PPG basecoat colors ans sometimes House Of Kolor, but the PPG is cheaper and in my opinion the work better.
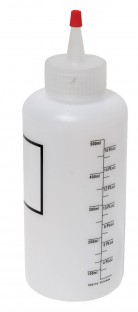
- Solvent Proof plastic mixing bottles are perfect for placing each separate color in as well as each separate candy color in. The bottles with the flip open tips for pouring out the paint or candy works really nice.
- As far as the PPG reducers go, check your weather and temperatures for which reducer to get. If it is cold outside, then you will need a fast reducer, if it is mid temps, then you will want a medium reducer, if it is hot outside, then use the slow reducers.
- Tack rags can be purchased anywhere. No special brand needed.
- I also like to get some of my supplies from TCPGlobal.com …they are cheaper than most paint stores and ship out fast.
- I like PPG brand clearcoat, although the House Of Kolor is good to, just higher priced. TCPGlobal.com also has their house brands that work very well. When using clearcoats, the weather and what hardeners you use are just the same as the reducers mentioned above, so make sure you pay attention these!
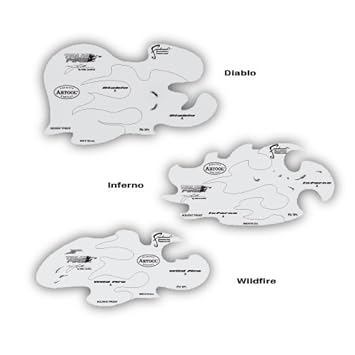
- Freehand Shields that can be purchased at TCPGlobal.com. These freehand shield are not a stencil you lay down and blow paint around. They are a shield for using the edges and rounded parts of the shield for creating different shapes and sharp edges of the real fire look. (Trying to use them as a stencil will make your project look poor and just like a stenciled piece that some beginner just did…the easy way). Be professional and do it the “right way”!
- You will also need some PPG DX330 Wax and Grease Remover for wiping down real good before and after you paint as well as each day before you start painting again. This removes dirt and any oils from your fingers and hands as you have touched the project along the way.
ATTENTION: Make sure that your freehand shields/stencils that you use are solvent proof or the reducers and paint will ruin them in a short time. This goes the same for your paint bottles! You can find these solvent proof bottles at Amazon.com or at eBay.com either one. TCPGlobal also has these bottles, and freehand shields as well.

These colors above are basecoat colors except for the ones that say candy beside them. For the Moly Red you will need to mix candy apple red and tangerine orange basecoat colors together to come up with the Moly Red/Orange color that works the very best. It actually gives the fire a real glow down deep.
The candy red/maroon is candy concentrates from House Of Kolor and is actually candy maroon.
The passion purple is a Chrysler color that is used at the end of the project right before clearcoating.
Have your basecoat color laid down and dry. Preferably you are using black basecoat? Other colors can be used, but the black basecoat will give you the best and most realistic look of actual fire.
You will also need tack clothes and mild wax and grease remover.
Step 1:
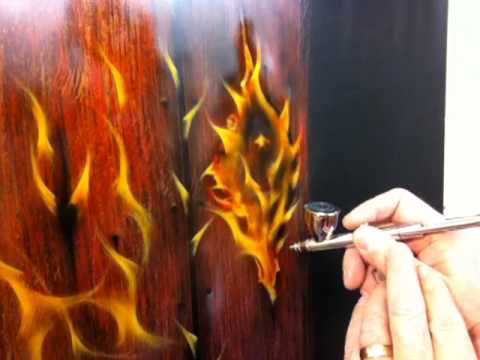
Place the Moly Red/Orange in your airbrush and start laying down some fire licks. I like to do freehand and then come in with a freehand shield and sharpen up some of the edges. It all depends on the size of the project panel as to how big the fire should be and how much.
Step 2:
- Take your tack rag and wipe down the panel to remove the paint dust. Do this after every step of colors you use.
Step 3:
- Now clean out your airbrush and add the candy red/maroon to your airbrush, or to a small mini gun if it is a large project and spray the candy right over your moly red colors.
Step 4:
- After this drys, then take your tack rag and wipe down good.
Step 5:
- Now clean out your airbrush and mix in the chrome yellow. You will take your freehand shields and start laying out another set of flames over the first set of moly red ones. DO NOT completely cover the red, make sure it stays transparent so that you can see through the yellow and see the red.
Step 6:
- Now you will clean out your airbrush and add in your Candy tangerine (orange) and after wiping everything down with a tack cloth, then shoot your candy tangerine over the previous step until you reach your desired orange color look. I usually use at least 2 coats of the orange candy to reach the color I am after. This candy drys pretty quick, so you don’t have to wait very long at all before you can shoot the second and even third coats.
Step 7:
Now clean your airbrush out and add in Pegan Gold and shoot it over everything that you have done previous to this step…after you wipe it all down with the tack rag. This will give your previous steps more pop and glow. I use the same paint reducer that I use in my basecoat paints to clean out my airbrush each time and to also reduce my candy colors with.
Step 8:
Now you will add in chrome yellow again to your airbrush after cleaning it out from the previous colors. Take your chrome yellow and use your freehand shields and start sharpening up some of the lower parts of the fire licks around the edges and circles. Don’t over do it with the yellow this time, just sharpen up some the the hot spot areas and redefine the fire.
Don’t forget to use the tack rag in between each color that you use. This will keep your project clean and paint dust free, and will result in a much cleaner project in the end.
Step 9:
Clean the airbrush out and add candy tangerine again. Apply the candy tangerine over the yellow that you just shot after you use your tack rag and wife down.
Step 10:
Clean out the airbrush and now add white and chrome yellow (half and half…equal amounts of each) and at the tops of the fire lick you will take your freehand shield and make some “hot spots”.
Step 11:
Clean airbrush out and add pegan gold. Use the pegan gold over the white/yellow that you just shot. This will really make your fire have “glow spots”.
Step 12:
If you have a black basecoat color and have some areas that you maybe overdone it with a certain color, or would like to “erase” something, then take some black basecoat and use your airbrush to simply fog in some black over the areas you’d like to erase and wipe down with tack rag when dry.
Last Step Before Clearcoating:
Mix up the Passion Purple in your airbrush and add just a little at the ends of the fire and licks. Not in the beginning of the fire, but out towards the ends of the fire licks. This will give it an extra pop that others won’t have, and it is very cool looking.
Now you should be pretty much ready for clearcoat once you have wiped everything down with a clean tack rag. You are so lucky to have a step by step eBook that walks you through the steps of this real fire, and don’t forget, you also have access to my step by step videos here.

REMEMBER this HUGE TIP!
If your basecoats and candy’s sit around for over 6 hours, then you need to take the PPG DBC 500 Blender and with either the airbrush or a mini gun shoot the blender reduced with PPG reducer appr 4:1 and shoot it over your entire project before you do any other paint or airbrush work, or before you clearcoat. This step allows for the paint to be reopened and will adhere properly. Without this step you could potentially have a peeling problem down the road.

You’ve seen the cars and trucks running up and down the roads that have clearcoat peeling off of them, and you know how bad they look. This is exactly why they have this peeling problem. They sat around on the assembly line to long before clear, they lost that 6 hour window on the basecoat, and they didn’t use blenders before they shot the clear over them and now they are peeling off. The only other choice you have it to sand the surface to reopen it, however, by sanding anything that is not clearcoated it will show sand scratches, and if it is metallic colors, then it disturbs the metallic and will have awful streaks, and look like crap (it ruins it). So the only real choice you have is; using the PPG DBC 500 Blender.
As mentioned several times in this free eBook, you must wipe down your work in each step with a tack cloth to keep from having a dirty looking finished project. It is not needed to wipe down with wax and grease remover on each step, and as a matter of fact, do not do it, especially until the paint has completely dried, or you will likely remove some of your paint and leave streaking.
Airbrushes, Mini Guns, Big Guns and Freehand Shields I Use:


Any airbrush or mini guns will work for these projects. I personally love Iwata and ALL of my paint guns and airbrushes are Iwata. I use an Iwata Eclipse HP-CS airbrush and an Iwata HP-C Plus Airbrush for the tighter more detailed projects. My mini gun is an Iwata DPH50 and my large basecoat and clearcoat guns are the Iwata W-400.

Make sure you visit my online training site for the “how to” airbrush videos of real fire and anything else that you would ever want to paint or airbrush. That website can be found right here <<. You can also find other free eBook s there about airbrushing and other topics as well. Visit this article here to see one of the many Harley Custom Motorcycles that I have done and been featured in magazines and articles.
Have fun with this. Get your FREE eBook here <<.
-Mike Pilcher
In this free eBook as well as any other free eBook, you can only show so much. It is hard to show the details of how to use freehand shields, how to use an airbrush, paint gun, or mini guns. It is also hard to show the exact steps in a free eBook like this one. However, as mentioned in this book/article/blog post, there is videos on my online airbrush training site that will take you by the hand and show you in great detail how to not only use an airbrush, but how to use the freehand shields, how to hold and use the airbrush, the mini gun, and the larger paint gun.
Visit this website now << to get these step by step videos and so much more!
.
.